Your home Wi-Fi network is the gateway to your digital life. Think about it – everything connects through it, from your smart home gadgets and work emails to your online banking and private messages. But as technology keeps evolving, so do cyber threats. Hackers are always on the lookout for weak networks to exploit, and the last thing you want is for your personal data or even your identity to be at risk.
In 2025, securing your Wi-Fi isn’t just about setting a good password anymore. Cybercriminals are using AI-driven attacks, Wi-Fi sniffing tools, and even smart home loopholes to break into unprotected networks. The good news? You don’t need to be a tech wizard to lock things down. With just a few simple steps, you can keep your network safe from prying eyes.
This guide walks you through easy and advanced security measures to keep your home network safe. For a complete cybersecurity approach, check out The Ultimate Guide to Staying Safe Online: Privacy, Security, and Protection Tips.

What You’ll Learn
- How to change your router’s default settings to keep intruders out.
- Why WPA3 encryption is a game-changer for Wi-Fi security.
- The importance of firmware updates (and why ignoring them is risky).
- How setting up a guest network keeps your main devices safe.
- Advanced security tricks like firewalls, VPNs, and MAC address filtering to outsmart hackers.
By the time you finish this guide, you’ll have full control over your home Wi-Fi, making sure your network stays private and protected in 2025 and beyond.
Let’s get started!
Step 1: Change Your Router’s Default Settings
When you get a new router, it usually comes with a default username and password – ones that hackers can easily guess. Many cybercriminals use publicly available lists of default credentials to break into unsecured networks. Don’t let yours be one of them.
What You Need to Do:
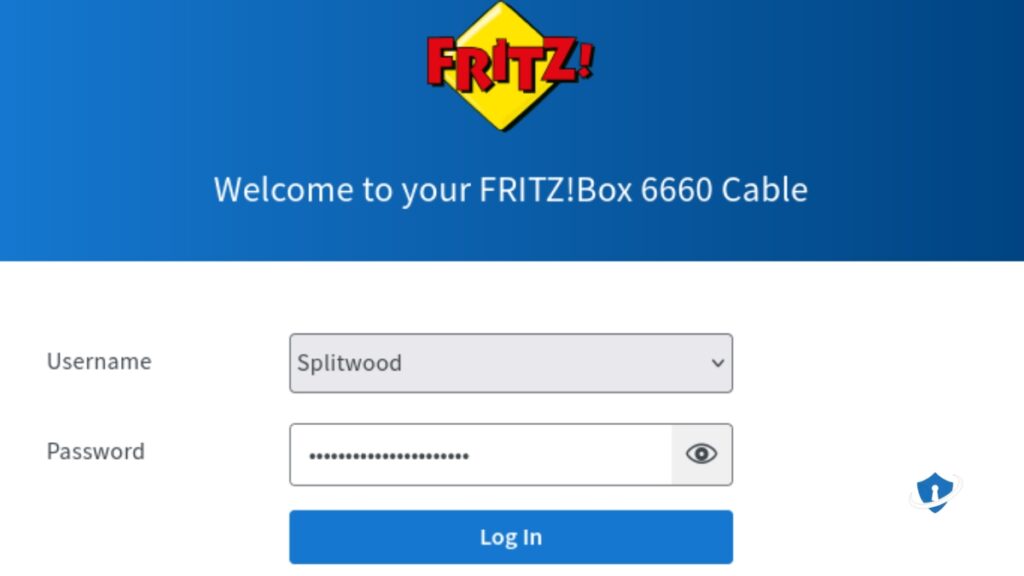
- Change the Admin Username and Password – Log into your router settings (usually by typing 192.168.1.1 or 192.168.0.1 into your browser). Set a strong, unique password with uppercase, lowercase, numbers, and special characters.
- To securely store your new router password, consider using a password manager like NordPass to prevent forgetting or reusing weak credentials.
- Disable Remote Management – This feature lets you access your router from anywhere, but it also gives hackers another entry point. If you don’t need it, turn it off.
- Rename Your Wi-Fi Network (SSID) – Using manufacturer-default names like “TP-Link_123” or “Netgear_456” makes it easier for hackers to guess your router type and attack known vulnerabilities. When renaming your network, also make sure to use a strong password that’s easy to remember to further secure your connection.
- Hide Your SSID (Optional) – For an extra layer of security, you can make your Wi-Fi network invisible. Only those who already know the name can connect.
A few simple tweaks like these make it much harder for hackers to take control of your home network.
Step 2: Enable WPA3 Encryption for Stronger Security
Wi-Fi encryption is a crucial layer of defense. It secures data transmitted between your device and your router, preventing unauthorized users on the same network from intercepting it.
Why WPA3 Encryption Matters
- Older encryption standards like WEP and WPA2 have known security gaps. WPA3 is the latest and most secure encryption protocol, offering Stronger protection against brute-force attacks – Even if a hacker tries multiple passwords, WPA3 makes it harder to crack them.
- Better encryption for both public and home networks – Each device gets its own encryption key, boosting security.
- Forward secrecy – Even if someone manages to hack into past data, they won’t be able to decode future transmissions.
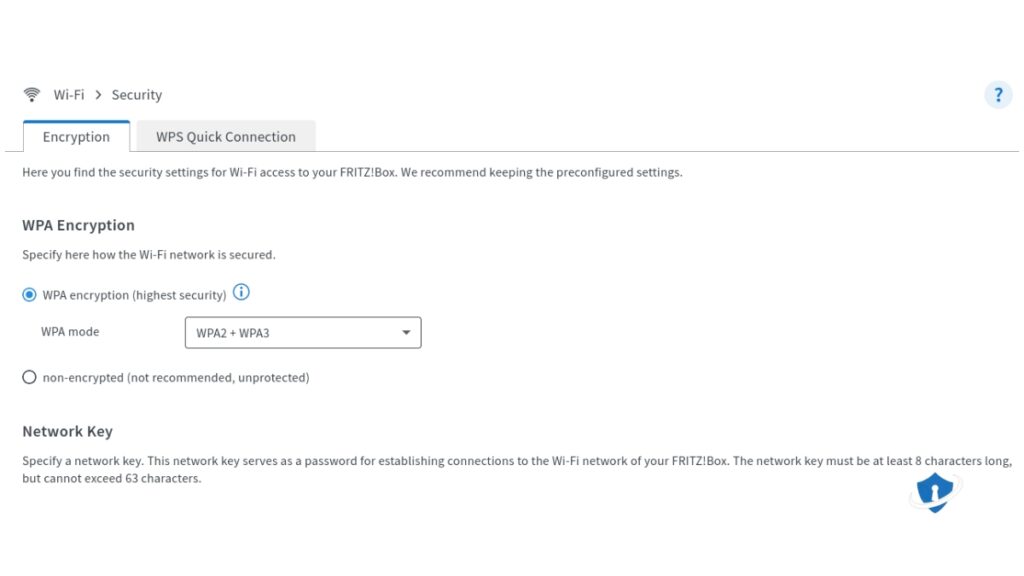
How to Enable WPA3 Encryption
- Log into Your Router Settings – Open your browser and enter your router’s IP address (usually 192.168.1.1 or 192.168.0.1).
- Find Wireless Security Settings – Look for the encryption options.
- Select WPA3-Personal (or WPA3/WPA2 Mixed Mode) – If some of your devices are older, the mixed mode lets them connect while still offering better security.
- Save and Restart Your Router – Apply the settings and reboot your router for them to take effect.
Check If Your Devices Support WPA3
Not all devices work with WPA3. If you have older gadgets that won’t connect after enabling it, check if a firmware update is available. If not, use the WPA3/WPA2 mixed mode instead. By switching to WPA3, you’re making your Wi-Fi much harder for cybercriminals to crack.
Step 3: Keep Your Router’s Firmware Updated
Your router’s firmware is like its operating system – it controls security, performance, and overall functionality. Manufacturers regularly release updates to patch vulnerabilities and enhance security.
Why Firmware Updates Matter
- Fixes Security Holes – Hackers love exploiting outdated firmware.
- Improves Performance – Updates often make your Wi-Fi faster and more stable.
- Enhances Compatibility – Ensures your router works with the latest devices and tech.

How to Update Your Router’s Firmware
- Log Into Your Router’s Admin Panel – Type your router’s IP address (192.168.1.1 or 192.168.0.1) into your web browser.
- Check for Updates – Navigate to the Firmware Update or System Update section.
- Download and Install the Latest Version – Some routers update automatically, but others require a manual download from the manufacturer’s website.
- Restart Your Router – After updating, reboot your router to apply the changes.
Enable Automatic Updates (If Available)
Some modern routers offer an auto-update feature. If your router supports it, enable this option to ensure you’re always running the latest firmware without needing to check manually.
By keeping your router updated, you eliminate known vulnerabilities and ensure your home network stays protected from the latest cyber threats.
Step 4: Set Up a Guest Network for Visitors
If guests often need Wi-Fi access, setting up a guest network is a smart way to keep your primary network secure.
Why a Guest Network is Important
- Protect Your Main Network – Guests won’t have access to sensitive devices.
- Prevents Malware Spread – A guest network keeps visitor devices separate from your main network, so malware on their device cannot directly infect your personal devices.
- Easy to Control – Some routers let you limit bandwidth or restrict activities.
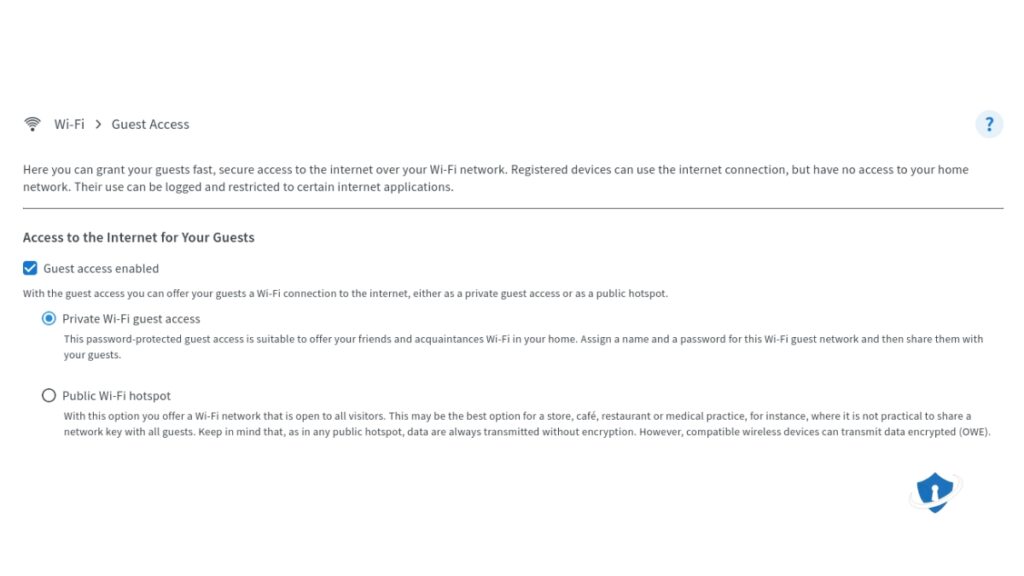
How to Set Up a Guest Network
- Log into Your Router Settings – Find the Guest Network section.
- Enable the Guest Network – Create a separate SSID for guests.
- Set a Strong Password – Use WPA3 encryption if available.
- Restrict Access to Local Network – Prevent guest devices from interacting with your main network.
Setting up a guest network is an easy way to add an extra layer of security while keeping visitors connected. Next, we’ll dive into advanced security techniques like firewalls, VPNs, and MAC address filtering.
Step 5: Use Advanced Security Features (Firewalls, VPNs, and MAC Filtering)

Enable Your Router’s Built-in Firewall
Enable Your Router’s Built-in Firewall – Most modern routers come with a built-in firewall that helps block unauthorized access. But firewalls alone aren’t enough—make sure you also know how to spot fake websites and avoid scams online to stay protected.
Use a VPN for Extra Privacy
Use a VPN for Extra Privacy – A Virtual Private Network (VPN) encrypts your internet traffic, making it harder for hackers to spy on your online activity. Learn how to set up a VPN on any device to protect your entire network.
A VPN like NordVPN or ProtonVPN encrypts your internet traffic, making it harder for hackers to spy on your online activity.
Enable MAC Address Filtering
MAC address filtering allows only approved devices to connect to your network, adding another layer of security.
🛡️ Secure Your Home Network with a VPN
Hackers can exploit unsecured Wi-Fi networks to steal data, track browsing activity, or even access personal devices. A VPN (Virtual Private Network) encrypts your connection, making your home network more secure.
📌 Top VPNs for Home Network Security:
✅ NordVPN – High-speed servers, strong encryption, and no-log policy.
✅ ProtonVPN – Privacy-focused with advanced security features.
🔒 Protect your home Wi-Fi today – Try a VPN risk-free.
Step 6: Regularly Monitor and Audit Your Network
Even after implementing strong security measures, ongoing monitoring is crucial to keeping your Wi-Fi network secure.
Why Monitoring Matters
- Detects Unusual Activity – Identifies unknown devices connecting to your network.
- Prevents Unauthorized Access – Helps you spot hacking attempts or suspicious logins.
- Maintains Network Performance – Ensures bandwidth isn’t being used by unwanted devices.

How to Monitor Your Network Security
- Check Your Router’s Connected Devices List – Log into your router’s admin panel to see a list of all devices currently connected.
- Enable Router Logging – Some routers allow you to track connection attempts and security events.
- Use a Network Monitoring Tool – Apps like Fing, GlassWire, or your router’s built-in monitoring system can help detect unusual activity.
- Set Up Alerts for New Connections – Many modern routers allow you to receive notifications when a new device connects.
- Change Wi-Fi Passwords Regularly – If you suspect unauthorized access, update your credentials immediately. For an extra layer of security, consider enabling Two-Factor Authentication (2FA) to protect your accounts from unauthorized logins.
By actively monitoring your network, you can quickly identify and eliminate security risks before they become major issues.
Taking Control of Your Home Wi-Fi Security
Securing your home Wi-Fi network is essential as cyber threats continue to evolve. By following the steps outlined in this guide, you’ll greatly reduce your risk of hacking, data theft, and unauthorized access.
Key Takeaways:
- Change default router settings and use a strong password.
- Enable WPA3 encryption for the highest level of security.
- Keep your router’s firmware updated to patch vulnerabilities.
- Set up a guest network to isolate visitor devices.
- Use firewalls, VPNs, and MAC filtering for enhanced protection.
- Monitor your network regularly to detect suspicious activity.

Taking these steps will ensure that your Wi-Fi network remains private, secure, and optimized for performance.
Now that you’ve secured your home Wi-Fi, stay vigilant and regularly update your security settings to stay ahead of cyber threats.